

Read Our Refund & Return Information
Dimensional product studio / Relief-map guide

Custom 3D TPU Logo Patches with a Measured Relief Map

Develop a custom 3D TPU logo patch by describing its physical geometry, not only the flat brand mark. Teebling helps wholesale buyers map raised and recessed areas, color layers, edge profile, receiving product, attachment direction, physical sample and repeat-order archive. The requested material and construction are confirmed for the individual project. This guide creates a precise design dossier without inventing relief heights, performance results or one attachment method for every garment and accessory.

View a dimensional patch reference
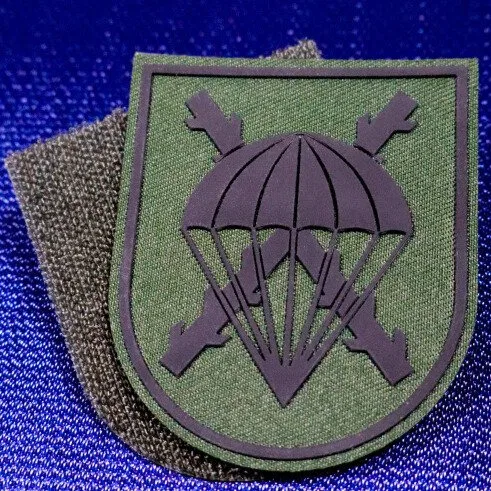
Custom dimensional TPU-style logo patches showing relief and edge forms
Reference imagery guides the brief; a numbered relief map and approved physical sample define the custom order.
01 / Brand sensation

Define What the Logo Should Feel Like

Begin with the brand role and viewing context. A compact hem marker, bold exterior badge and bag emblem may use the same logo but need different scale, relief hierarchy and edge behavior.

Quiet dimensional signature

Use controlled relief and a compact silhouette when the patch supports a garment rather than dominates it. Set the viewing distance, exact placement and garment colors before choosing tonal or contrasting layers. Print the logo at the real finished size and verify that text remains readable.

  • Neck, hem, pocket or sleeve identity
  • Tonal palette with relief-led recognition
  • Measured relationship to garment seams
Visible logo component

For bags, outerwear, caps or statement apparel, the patch can act as a product feature. Define the outer silhouette, primary raised mark, secondary recessed detail and visual edge. Share several viewing angles so the desired depth hierarchy is clear without relying on dramatic rendering alone.

  • Front-facing mark with intentional profile
  • Layered color or border system
  • Physical sample judged in product context
02 / Contour steps

Build the Relief Height Map

Assign every artwork area to a numbered level and explain its relationship to the base. Teebling can review the concept when the drawing is measurable and internally consistent.

L0

Base plane

Define the finished outer shape, width, height and background field. Mark which parts remain visible around the logo.

L1

Secondary level

Assign borders, supporting text or inset fields to a distinct level. State whether each area is raised or recessed relative to the base.

L2

Primary logo

Give the main word mark or icon the strongest hierarchy where appropriate. Protect small counters and gaps at true physical scale.

Include front, side and section views with the same level numbers.

Use dimensions or agreed level relationships rather than visual shading alone.

Show where one level ends and another begins around narrow artwork detail.

Keep the true-size view beside enlarged construction details during approval.

03 / Color wells

Separate Raised and Recessed Color

Assign colors by physical component. A palette list should explain which level, letter, border or base each direction belongs to and how the patch should read against the receiving product.

Graphite base
Cyan logo
Light contour
Warm accent
Neutral field

These swatches illustrate role naming, not guaranteed production colors. Provide the buyer’s references and approve the physical sample under consistent light. Create a separate variant when garment colors require a different patch palette.

04 / Edge carousel

Choose the Edge Profile

The edge controls silhouette, visual weight and the transition into the receiving product. Show its geometry on a front outline and side profile.

Square frame

A geometric boundary can organize a complex logo. Set corner treatment, border width direction and clear space around the mark.

Rounded frame

Softened corners may support an apparel or accessory context. Confirm the true outer dimensions after rounding.

Logo-following edge

An outline that follows the mark needs enough connection between narrow features. Review all projections at actual size.

Custom profile

For angled, stepped or asymmetrical edges, provide a vector cut path and a section drawing rather than a perspective image alone.

05 / Attachment plinths

Match Attachment to the Product

The patch and receiving product form one assembly. Identify fabric or panel, placement, movement, curvature, access and preferred production workflow before an attachment direction is approved.

Heat-assisted direction

Provide the target substrate and representative product for testing. Document the equipment and process used for the accepted combination without transferring assumptions from another fabric.

Sewing or captured construction

Show the stitch path, edge allowance, thread color and assembly sequence. Confirm that the patch geometry leaves practical space for the intended operation.

Product-specific assembly

For molded accessories, hardware, caps or structured panels, send the full product drawing and handling requirement. Teebling can review the exact request rather than implying a universal method.

Dimensional TPU and silicone label reference used for layered artwork review
A clear dimensional drawing separates mold or production information from an illustrative rendering.
06 / Mold checklist

Prepare Mold-Ready Artwork

“Mold-ready” means the design package communicates the intended physical form for technical review; it does not mean a buyer file bypasses Teebling’s feasibility checks. Supply clean vector paths and a complete dimensional annotation set.

  • Exact logo content, capitalization and protected proportions.
  • Finished width and height plus the outer edge vector path.
  • Numbered relief map, side sections and level relationships.
  • Color assigned to every base, raised, recessed and border component.
  • Target product, placement, orientation and attachment direction.
  • True-size view for judging text, gaps and narrow projections.
07 / Physical review

Inspect the Physical Sample

Review the sample as an object and as part of the receiving product. Use labeled photographs and measurements so comments can be traced to one revision.

FACE

Logo and color

Confirm wording, proportions, true-size readability, level hierarchy and color direction under consistent light.

PROFILE

Relief and edge

View side sections, transitions, border, corners and narrow features. Compare the sample with the numbered relief map.

PLACE

Product context

Check scale, orientation and relationship to seams, pockets, hardware or curvature on the intended item.

ATTACH

Assembly result

Inspect the patch, all edges, surrounding material and reverse after the representative attachment trial.

08 / Approved reference

Archive the Approved Mold Reference

Save the approved physical and digital evidence under one stable project code. A future reorder should begin by reconfirming that record and identifying every requested change.

Artwork identity

Named vector revision, exact wording, outer path and true-size approval view.

Dimensional build

Finished dimensions, numbered relief map, level sections, colors and edge profile.

Physical evidence

Sample code, front and profile photographs and buyer approval notes.

Receiving product

Item, placement, attachment record, variant quantity and packing format.

09 / Development brief

Send the 3D TPU Brief

Attach the logo artwork, relief map, edge drawing, color roles, receiving-product specification and quantity matrix. Teebling can review the requested construction, sample path and current commercial details from a complete dimensional dossier.

10 / Dimensional questions

Custom 3D TPU logo patch FAQ

These answers help organize a development request. Final construction, material, appearance and attachment are confirmed for the individual Teebling project.

What should a custom 3D TPU logo patch quote include?

Provide editable logo artwork, exact finished width and height, annotated relief levels, color roles, edge profile, target product and placement, attachment direction, quantity by version, packing, destination and requested timing.

How should raised and recessed areas be shown?

Use a numbered relief map that assigns every logo component to a defined level and include side-profile sketches. Do not rely only on shaded rendering; Teebling needs an unambiguous drawing and a true-size view for review.

Can very small lettering be used in a dimensional TPU patch?

Small text must be reviewed at the intended physical size. Narrow counters, thin lines and tight layer gaps may need adjustment. Buyers should approve a physical sample rather than assuming a large digital image proves readability.

Which attachment method should be selected?

The choice depends on patch construction, target product, fabric or panel, placement and the buyer’s production workflow. Share the receiving product and preferred direction so a representative attachment review can be planned.

What should be archived for a repeat 3D logo patch order?

Save the approved artwork revision, dimensions, relief map, color and edge specification, physical sample identity, attachment record, receiving product, quantity matrix and packing format. Reconfirm current inputs and terms before each reorder.

Welcome Guest!